
Slic3d spool-less filament lets you reuse a printed spool to load new filament, saving you money, reducing waste, and you'll avoid the dust that can come from using cardboard spools.
Overview
- You'll need to print your first spool using PLA, PLA+ or PETG with 3-walls, 30%-infill, see below.
- Drop the filament into the spool Side 2 with the spool "nub" in the notch on the cardboard sleeve.
- Insert and twist-on the other spool side till it "clicks", and release the tapes.
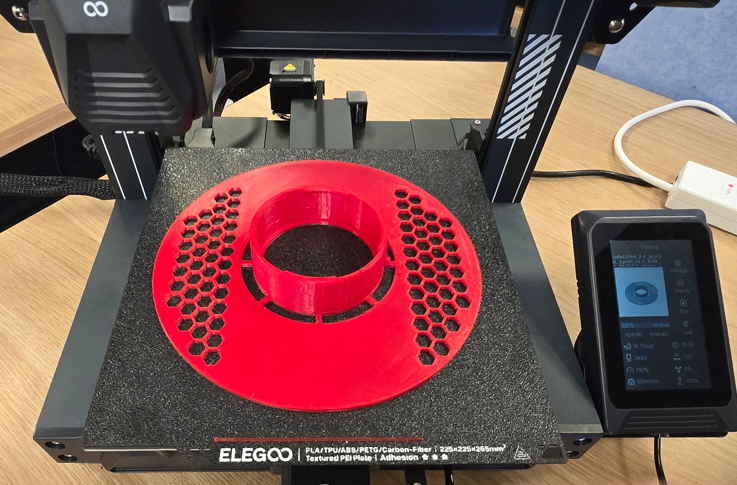
Printing the spool halves
Set your Walls parameter to 3, and Infill parameter to 30%, Rectilinear, or Gyroid infill.
- PLA or PLA+ filament works well - avoid using Silk as it can be too brittle.
- PETG is best if using a heated filament dryer with metal rollers (such as Creality Space Pi).
- It isn't necessary to enable a Brim or Supports, as the design is created to not require these.
- Each side will take around 2.5hours to print on a Centauri Carbon, or 3 hours on a Neptune 4Let them cool before you pull them off the build plate, so they stay straight and level
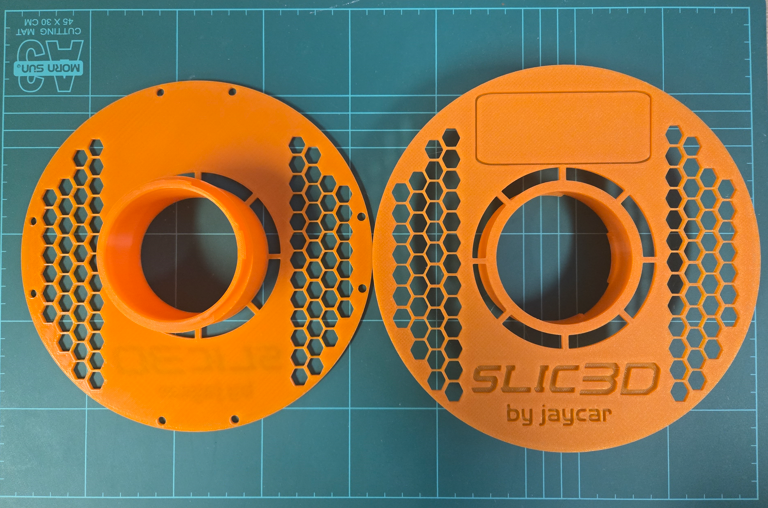
Test-fit the spool
Place the spool halves ready to mate, and see where the tabs will engage in gaps on the other half.
Push them together, and twist them to engage the tabs.
You'll feel some resistance, and then a distinct "click" at the end which locks them together.
Twist them back the opposite way to separate them.
Getting the filament ready
Cut the bag open and remove the filament from the bag. Don't remove the tape yet!
Installing the filament on the spool
Find the notch on one side of the filament's cardboard sleeve.

Find the matching "nub" in the spool half (Side 2) that the notch will sit on.
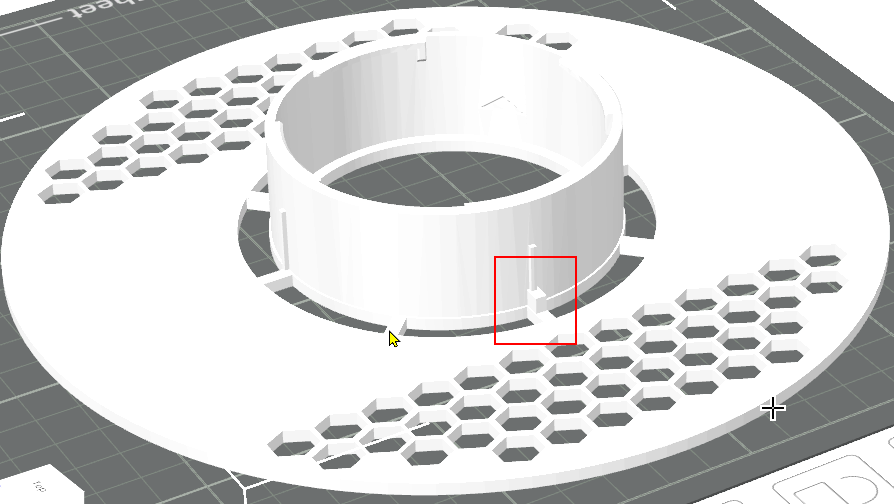
Place the filament on the spool half with the "nub", and check the "nub" engages the notch in the sleeve.


Put the other spool half into place, so the locking tabs line up with their opposite gaps.
Push the halves together firmly and twist until you feel the "click".
Check that the sides are parallel/level, and that all the tabs in the cylinder engaged.
If the sides do not look level, untwist them and try again.

Peel all the tapes and pull them out, keeping a finger on the end of the filament so it does not go loose.
Tuck the filament end into the available holes in the rim, or use a filament clip, and you are done!