Transform recycled bits and pieces into an analogue way to talk to your family.
Introduce the kids to three fundamental ideas in electronics, and help them make a simple project that takes minutes to assemble but provides hours of fun. You might be amazed how quickly your little ones will be speaking fluent Morse! Although this is a safe, low-voltage project, children should always be supervised while making.
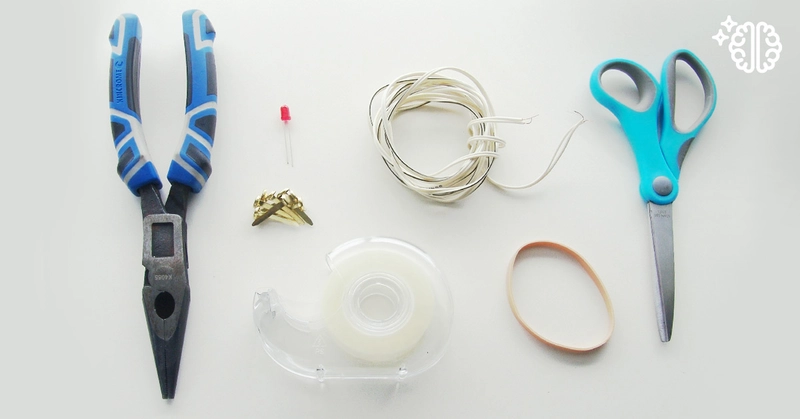
What you need to make a Morse code transmitter
‣ Ruler, marker and scissors
‣ Empty milk bottle
‣ Split pin paper fasteners
‣ Aluminium foil
‣ Sticky tape
‣ Figure-eight wire (which can be recycled from a busted pair of earphones, a speaker or DC power supply. Alternatively, lengths of figure-eight wire are as cheap as 60c per metre)
‣ Pliers
‣ 2 x AA batteries
‣ Rubber band
‣ Salvaged or new LED (Use an LED from old fairy lights or a broken electronic toy, or buy one.)
How to make a Morse code transmitter
Create the battery holder
If you'd rather skip creating the battery holder, just purchase a ready-made one.
1. Use the scissors to cut an 8.5 x 3cm rectangle from the milk bottle.
2. Poke two holes, 0.7cm in from each side and end, resulting in four holes in total, and push through paper fasteners.
3. On one end, bend the legs of the fasteners together, wrap them in a strip of aluminium foil, and secure with sticky tape.
4. Cut a 10cm length of figure-eight wire and strip about 1cm from both ends. On the end of the rectangle with the unattached paper fasteners, wrap a stripped end of wire around the legs of one fastener, then fold over the legs and crimp them with pliers.
5. Insulate the connection with sticky tape, then repeat for the last paper fastener.
6. Place two AA batteries, pointing in opposite directions, on the rectangle, with the + end of one battery (the one with the bump) next to the fastener connected to the wire with the stripe. This means the wire with the stripe can be called the + wire.
7. Hold the batteries in place with sticky tape, then fold the ends of the holder up so the fasteners are touching the terminals, and secure with the rubber band.
Make the switch
1. Cut a 10cm x 2cm strip and 10cm x 7cm rectangle from the milk bottle.
2. Poke a hole centred 1cm from each end of the strip and insert a paper fastener.
3. Cut a 15cm length of figure-eight wire and strip about 1cm from both ends.
4. At one end, split about 5cm of the wire so there are two free wires.
5. Wrap a stripped end of the split wire around the legs of the paper fasteners, fold over, crimp and insulate as before.
6. Fold the strip in half and sticky-tape the wires to the outside of the V, as shown.
7. Sticky-tape one side of the V to the middle of the rectangle, providing a stable base for your switch.
Connect it all up
1. Strip about 1cm from the ends of whatever length of wire you have left.
2. Wrap the wire with the stripe around the longer leg (or + leg) of the LED, bend it over and crimp it with the pliers, then insulate with sticky tape. (If you are using a salvaged LED, see our Mini maker tips below.)
3. Repeat for the other leg (or - leg).
4. Twist the end of the + wire from the battery holder around the end of the + wire from the LED and insulate with sticky tape.
5. Twist the other wire (or - wire) from the battery holder around one of the wires going to the switch and insulate with sticky tape.
6. Twist the other wire from the switch to the - wire going to the LED and insulate with sticky tape.
7. Press the switch closed and watch the LED light up!
Mini maker tips
‣ If you have purchased the LED, the long leg will go to the + wire from the battery holder; on a purchased battery holder, this is the red wire. LED stands for 'light-emitting diode'; a diode only lets current flow in one direction, so if you are using a salvaged LED, you'll need to figure out which is the 'right' way to connect it. When you've made the battery holder (instructions in the first set of steps), just touch the legs to the stripped ends of the wires. If the LED doesn't light up the first time, swap which wire goes to which leg. Use a marker or a small piece of sticky tape to indicate which is the + leg.
‣ When you're done, print out a Morse code table to keep near your transmitter.
‣ Want your kids to be able to communicate between bunk beds or bedrooms? Just make a second transmitter and check that the wires from the switch to the LED of both transmitters are long enough to reach between the areas you want to communicate from. Use tie-wire or cable ties to bundle the wires together, so the LED from one transmitter ends up close to the switch of the other unit.

